


The Sobremesa 10.
pear cardamom galette

I got pies pies pies on my mind.
Yup, this is the month where I’m going to embark on making hundreds of pies for all the lovely customers of Baked&Wired. I touched on this light anxiety I get every year in in Sobremesa 08., and I easeddddd into things (mostly for myself) with an apple crumble. And now I think it’s time to dial it up.
What makes a pie both so intimidating and delicious? It’s all about the CRUST, BABY! It’s gotta be buttery, flaky, all while holding it’s shit together so that you can fill it with a lot of yummy fruit or custard.
What’s amazing is that crust is just flour, salt, water, and butter. That’s it. And what I loooooove about making pie dough is that it’s all about feeling the dough. You really can’t just follow a recipe, mix it together, and *bam*— pie actually makes you freaking work for it. You gotta get your hands dirty, feel the texture of the dough through your fingers, go with your intuition when it feels right, and then trust your self. And yo, it’s probably going to take some time to get it right, so just be patient!
After years of making pies, there’s still times during our mega-Thanksgiving bake-off when I’m on my 99th pie of the day and my mother will peer over my shoulder at 3am and say “ooooh….you’re overworking the dough just a little….” which predictably pulls me into a tantrum (don’t worry, we always make up by the time we eat our frozen pizza at 4am). All this to say, making pie is a beautiful skill that also keeps us humble AF.
But don’t worry, I’m here to be that looming head over your shoulder now.
The next stop on our pie choo-choo train is the galette. Galettes popped up somewhere in 2018 as the lazy person’s Instagrammable pie. Somehow Bon Appétit managed to market the galette as the IT dessert and did a total rebrand … “look how rustic it is!” Galette’s PR team for the win because it’s actually supposed to look kinda ugly (or remember, we don’t say ugly, we say, “rustic!”). This is great news for the beginner because it gives you a lot of leeway. And honestly, I love a rustic baked good.
I’ve also recently been feeling bad for pears. Like, it’s Fall and they’re in their prime season rn too…. but everyone is just over there freaking out over apples and pumpkins. Pears are like the really sweet girl in your high school who plucked at her guitar during free period and skipped prom for a concert and you didn’t really notice her until you saw her at your 10 yr reunion and now they’re super hot, have their own startup and hosting salons in their living room with their other inspiring friends. They’re fucking COOL, okay, and you better start paying attention. In all seriousness, they are so delicious and so wonderful to bake with! So ditch those apples this week and pay attention to the nice girl in the back. Go on, girl!
Which leads us to …
the Pear Cardamom Galette.
Makes 2 galettes. One for you, and gift the other one to a friend!
Ingredients
Crust
1-1/2 cups flour (I did 50% whole wheat flour and 50% all-purpose because I like the nuttiness of the wholewheat)
1/2 cup butter (aka 1 stick), a bit cold but not quite room temperature
1/2 teaspoon kosher salt
1/3 cup ice cold water ( a little less if using whole wheat flour)
1 egg white
Pear Cardamom Filling
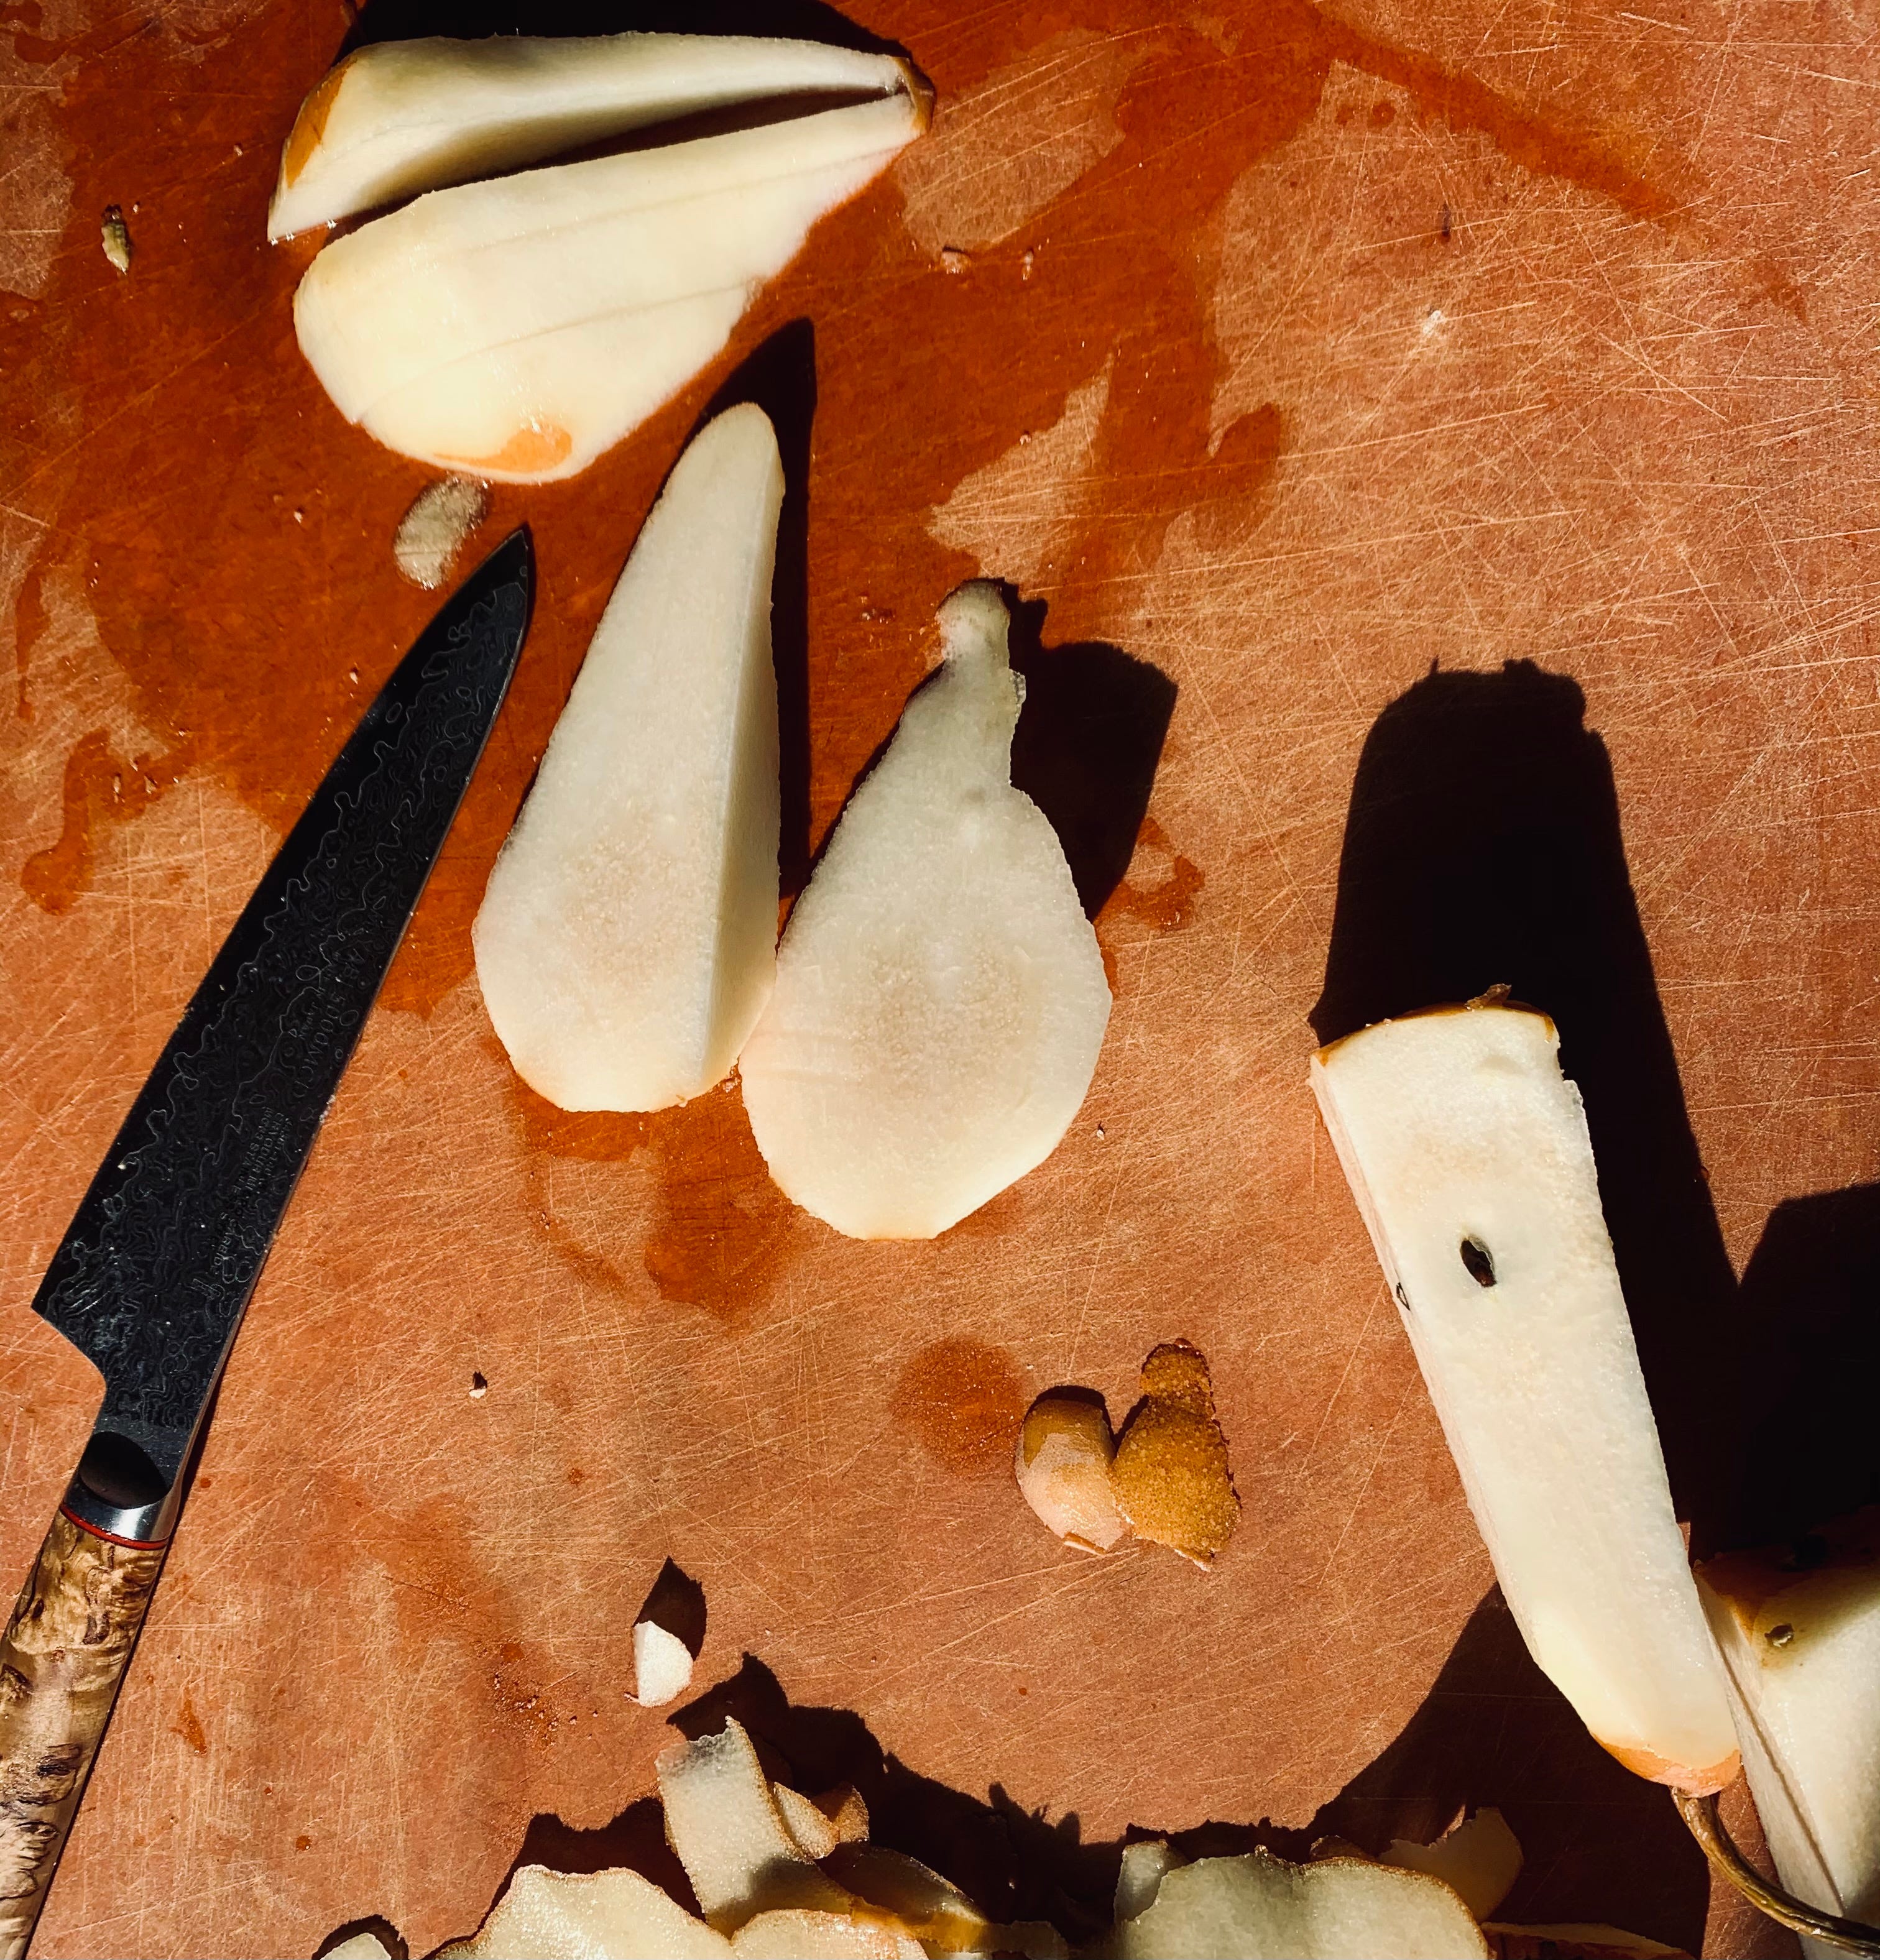
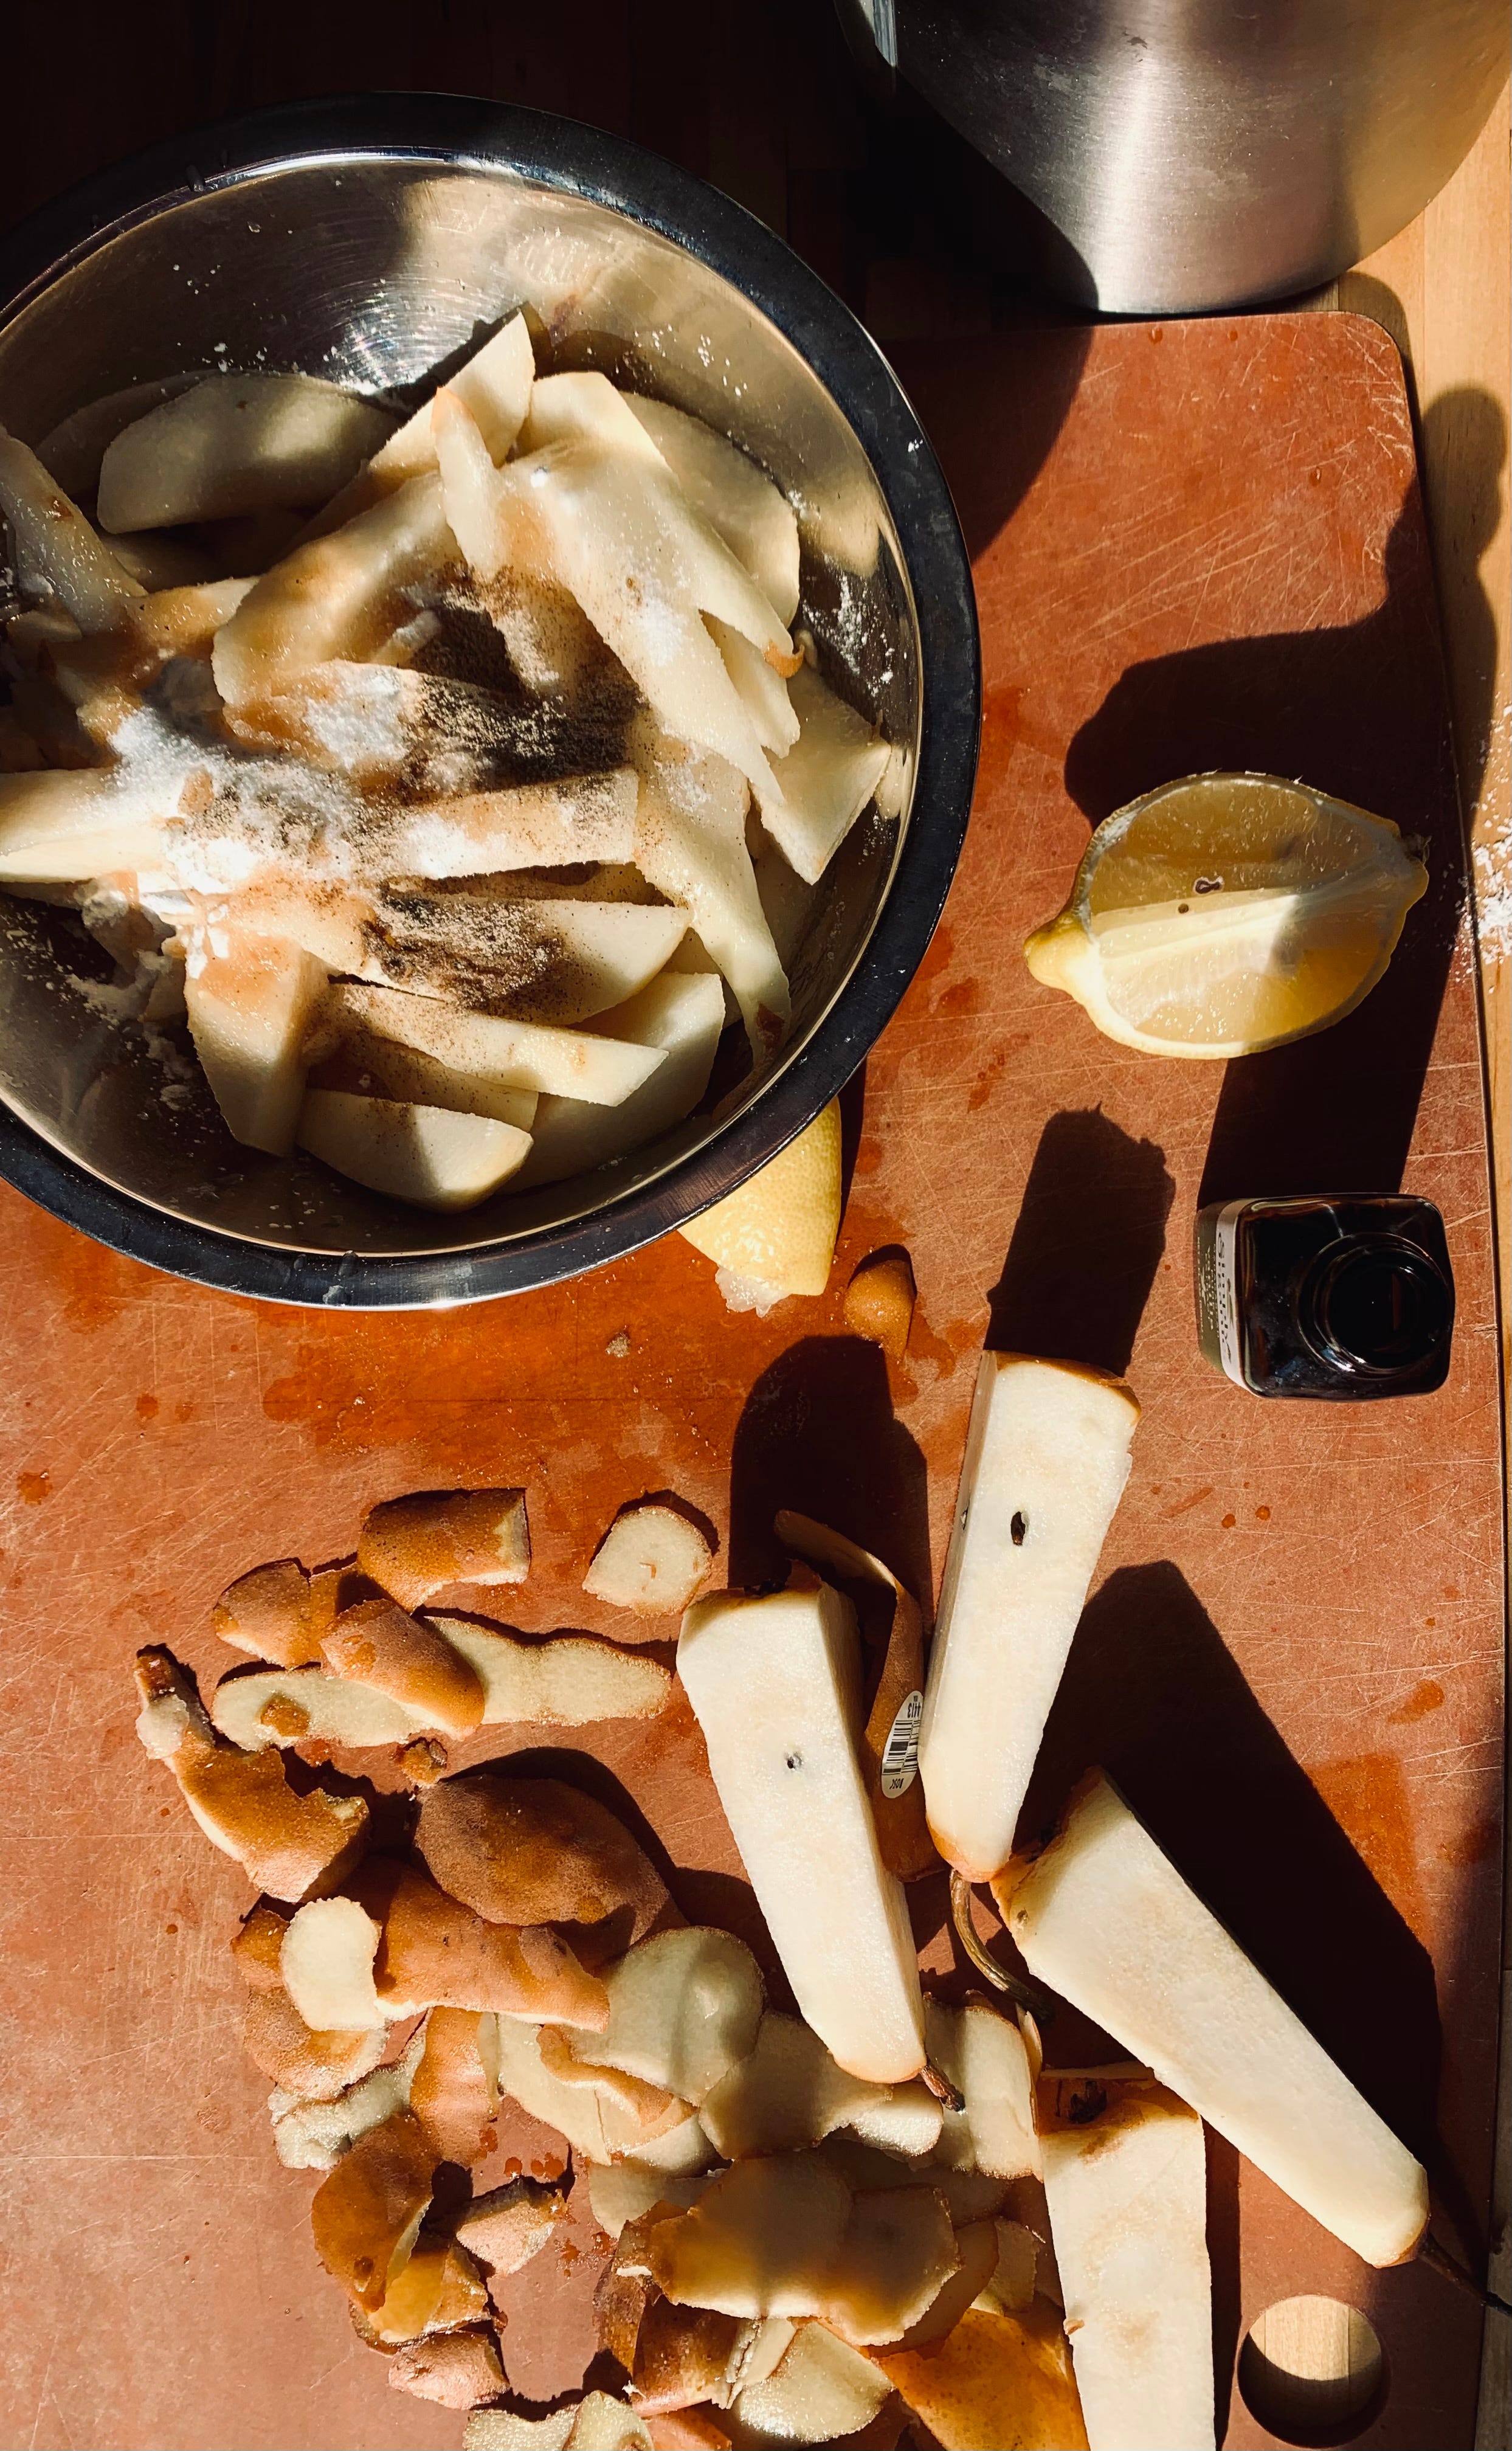
4 Bosch pears, peeled and sliced
1/2 teaspoon ground cardamom
1 teaspoon pure vanilla extract
1 tablespoon cornstarch
¼ cup sugar, plus more for sprinkling
Cinnamon, for sprinkling
Let’s goooo!
Set your oven to 375 F.
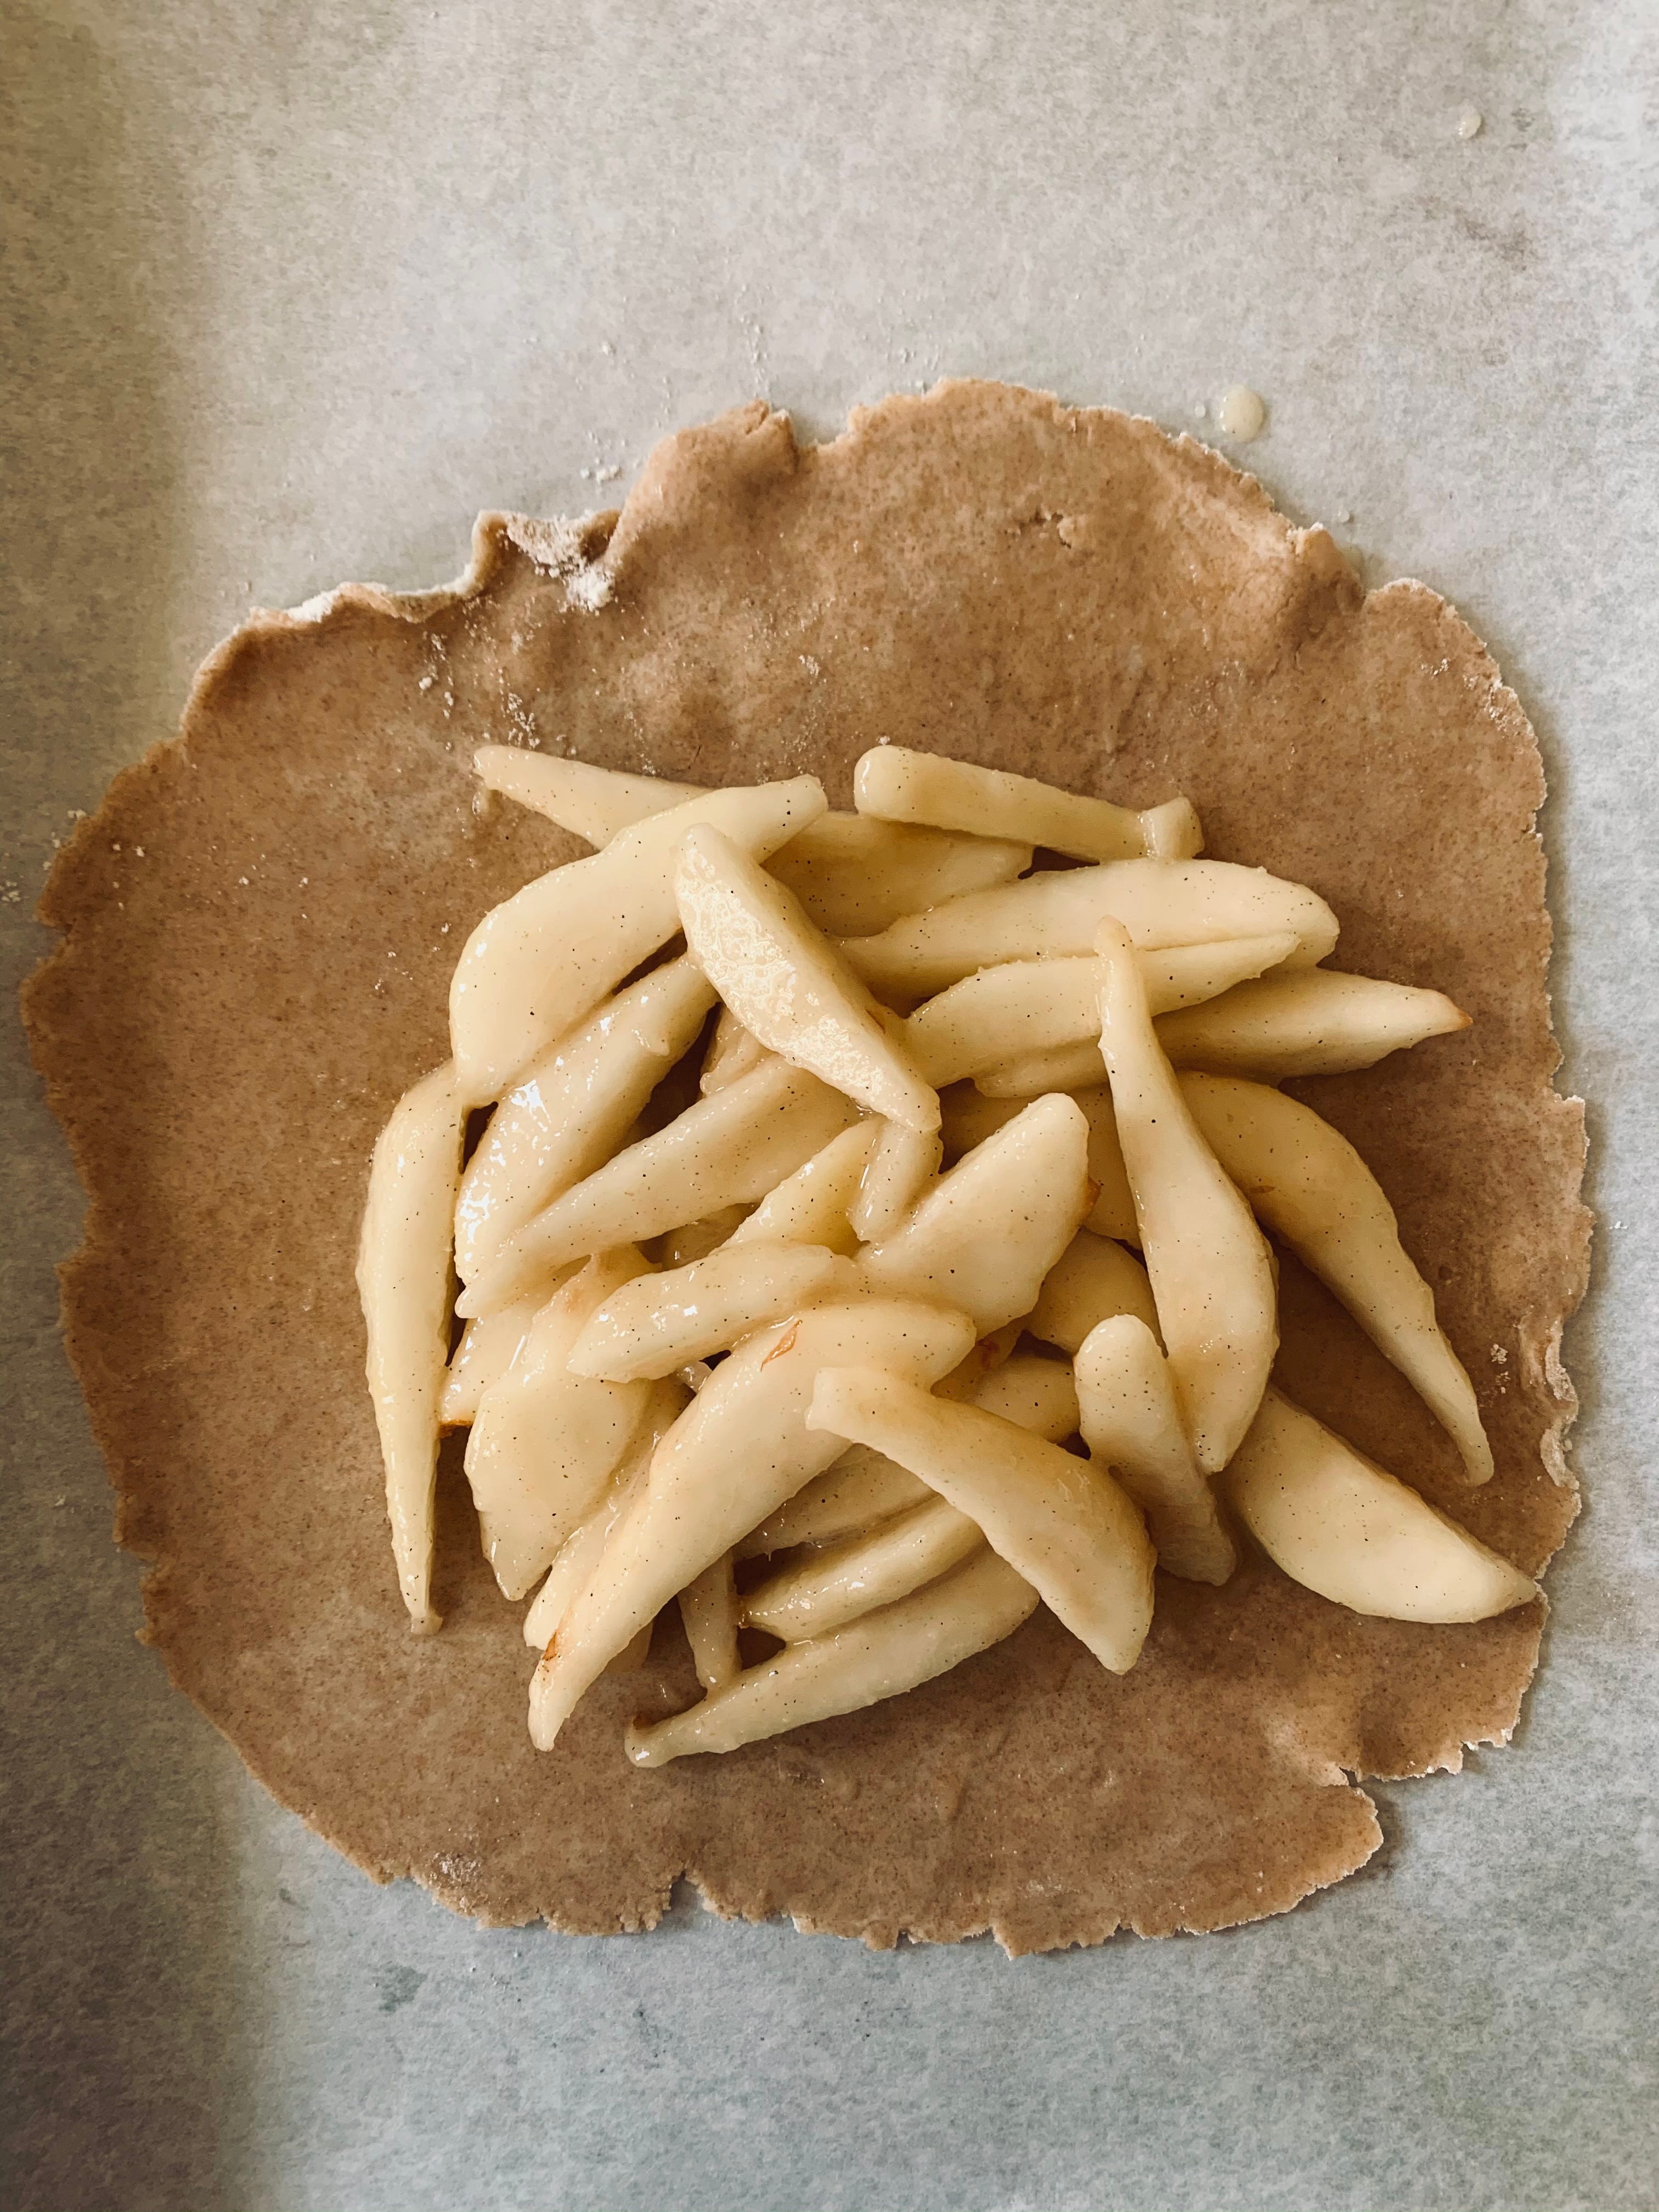
Let’s start with your filling. Peel and slice up your pears and add to a small bowl. Add cornstarch (this allows the fruit to bind), sugar, vanilla and cardamom. Mix it up and let it hang out on your counter while you make the dough.
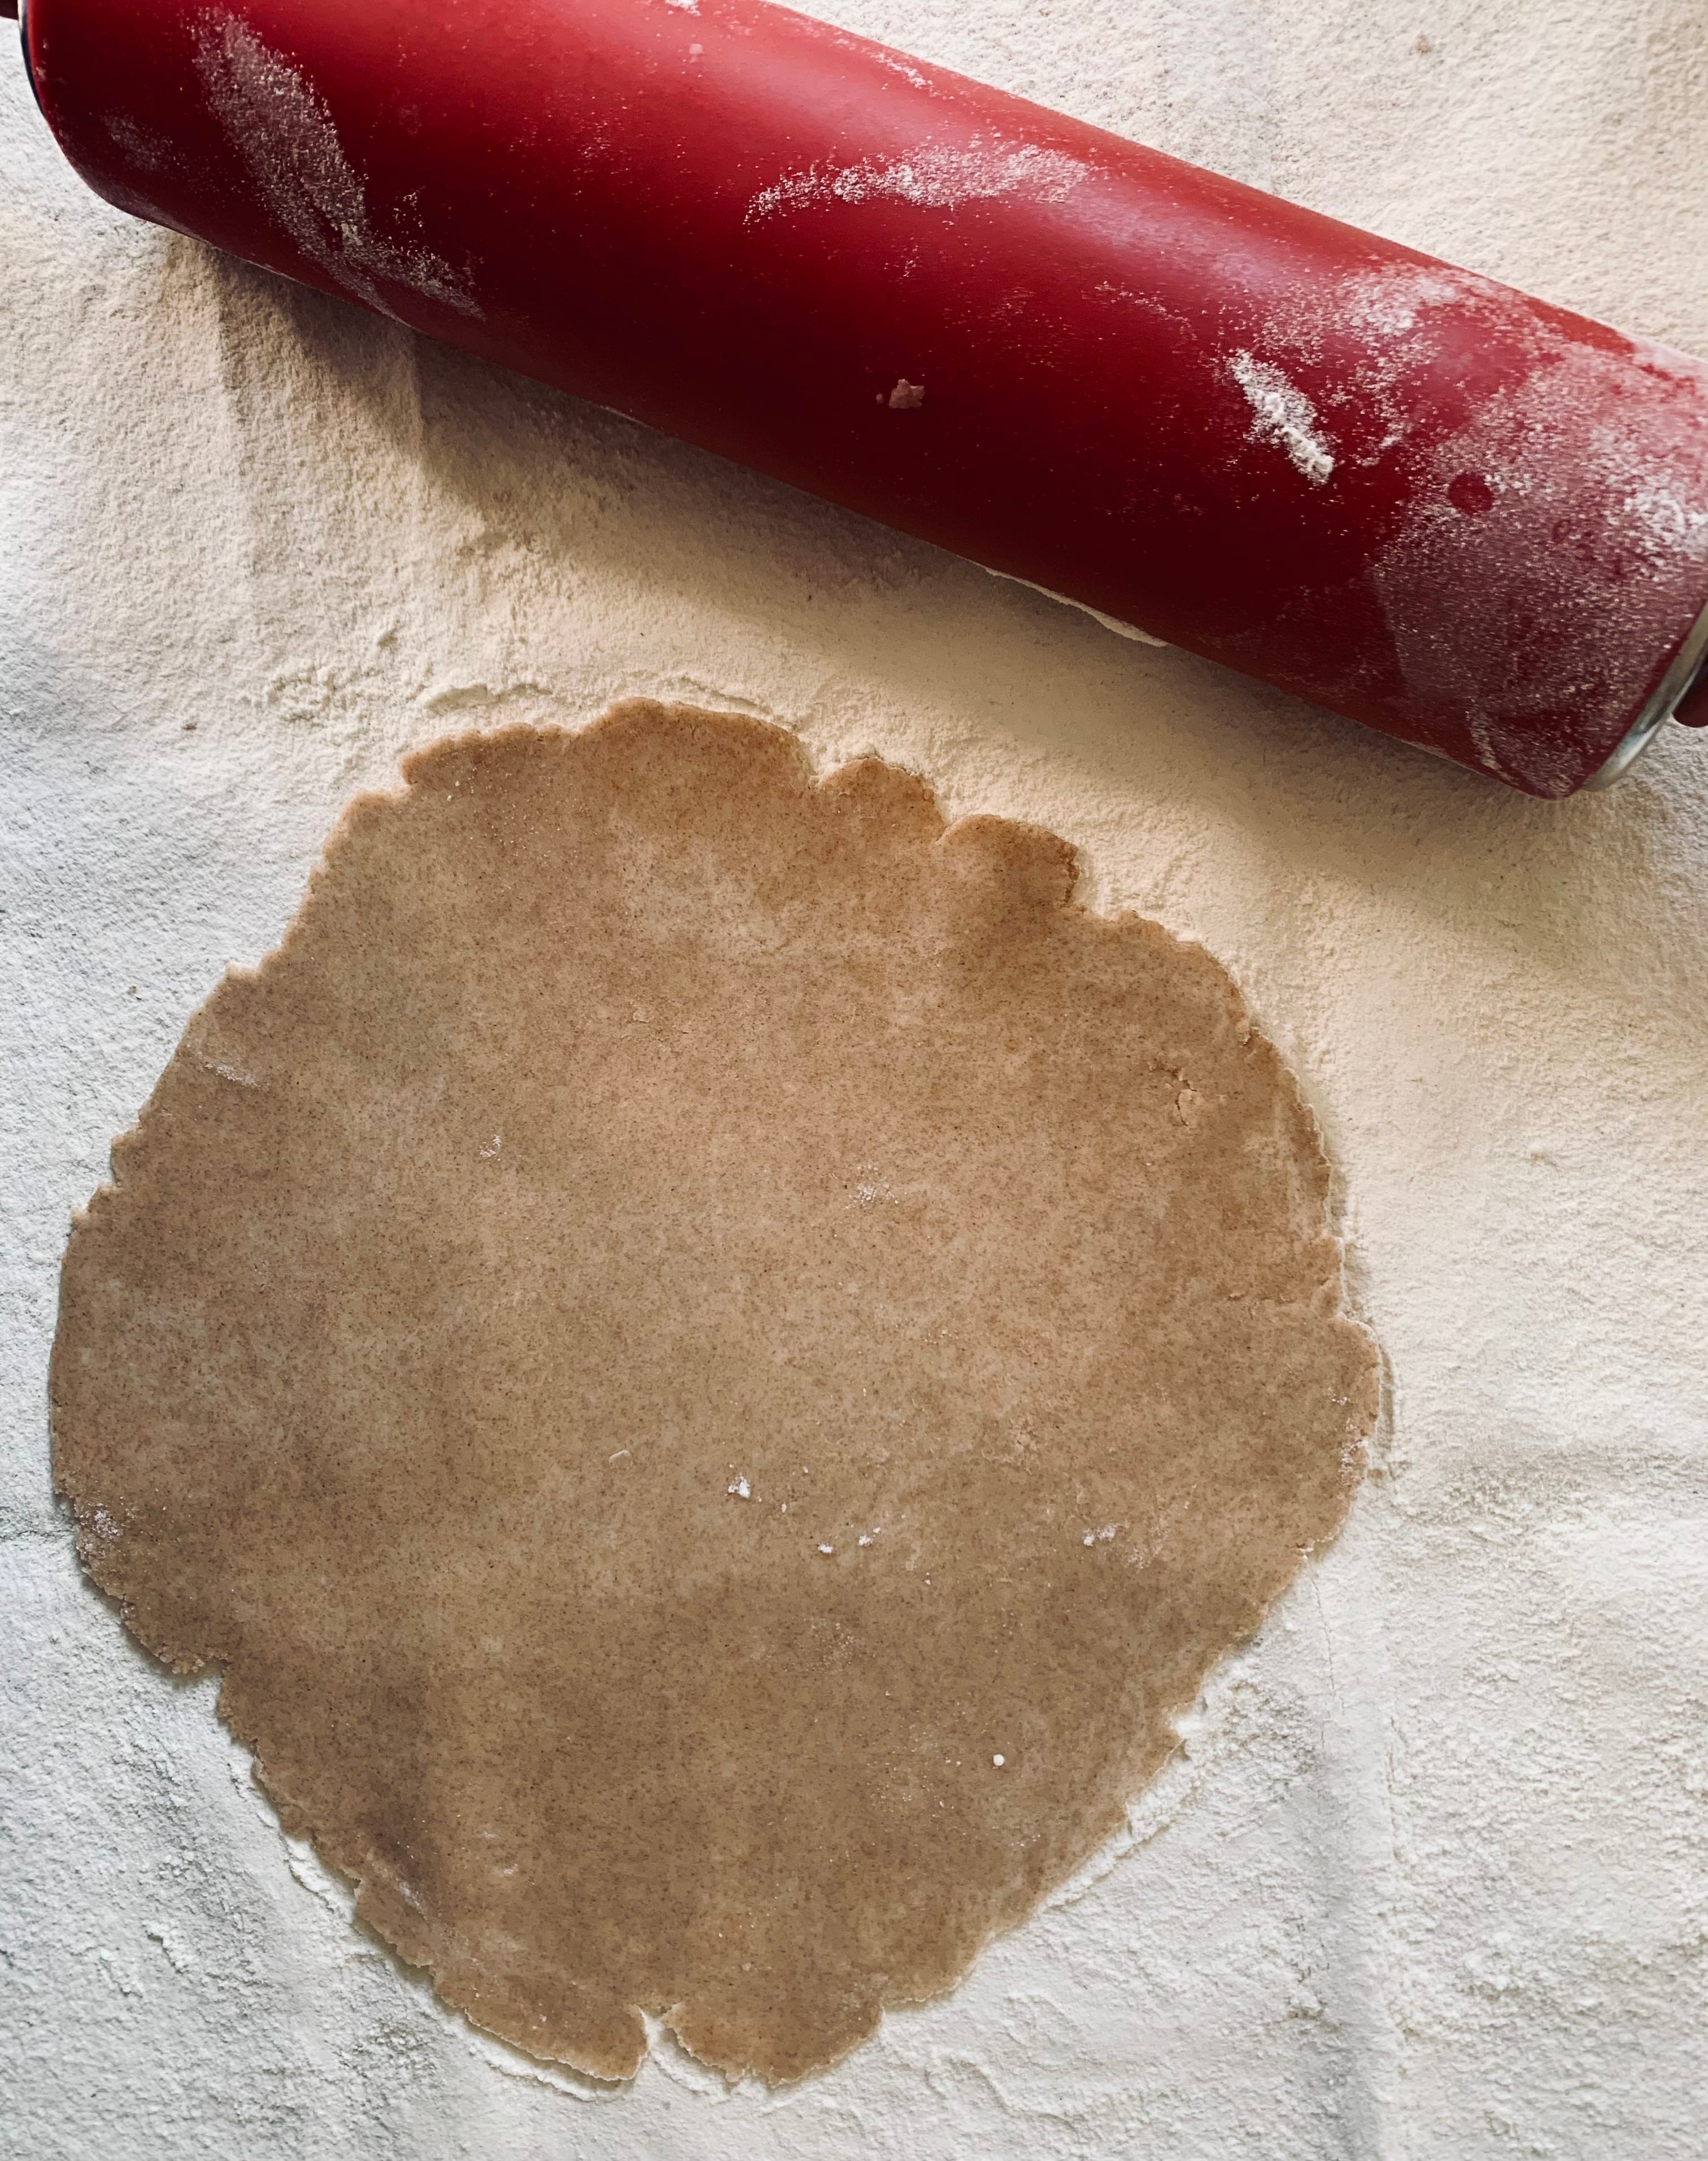
Dough time! Check out my Instagram Story highlights to see some video tutorials if my words aren’t making sense. Remember, you just gotta get your hands in the dough and feel it out.
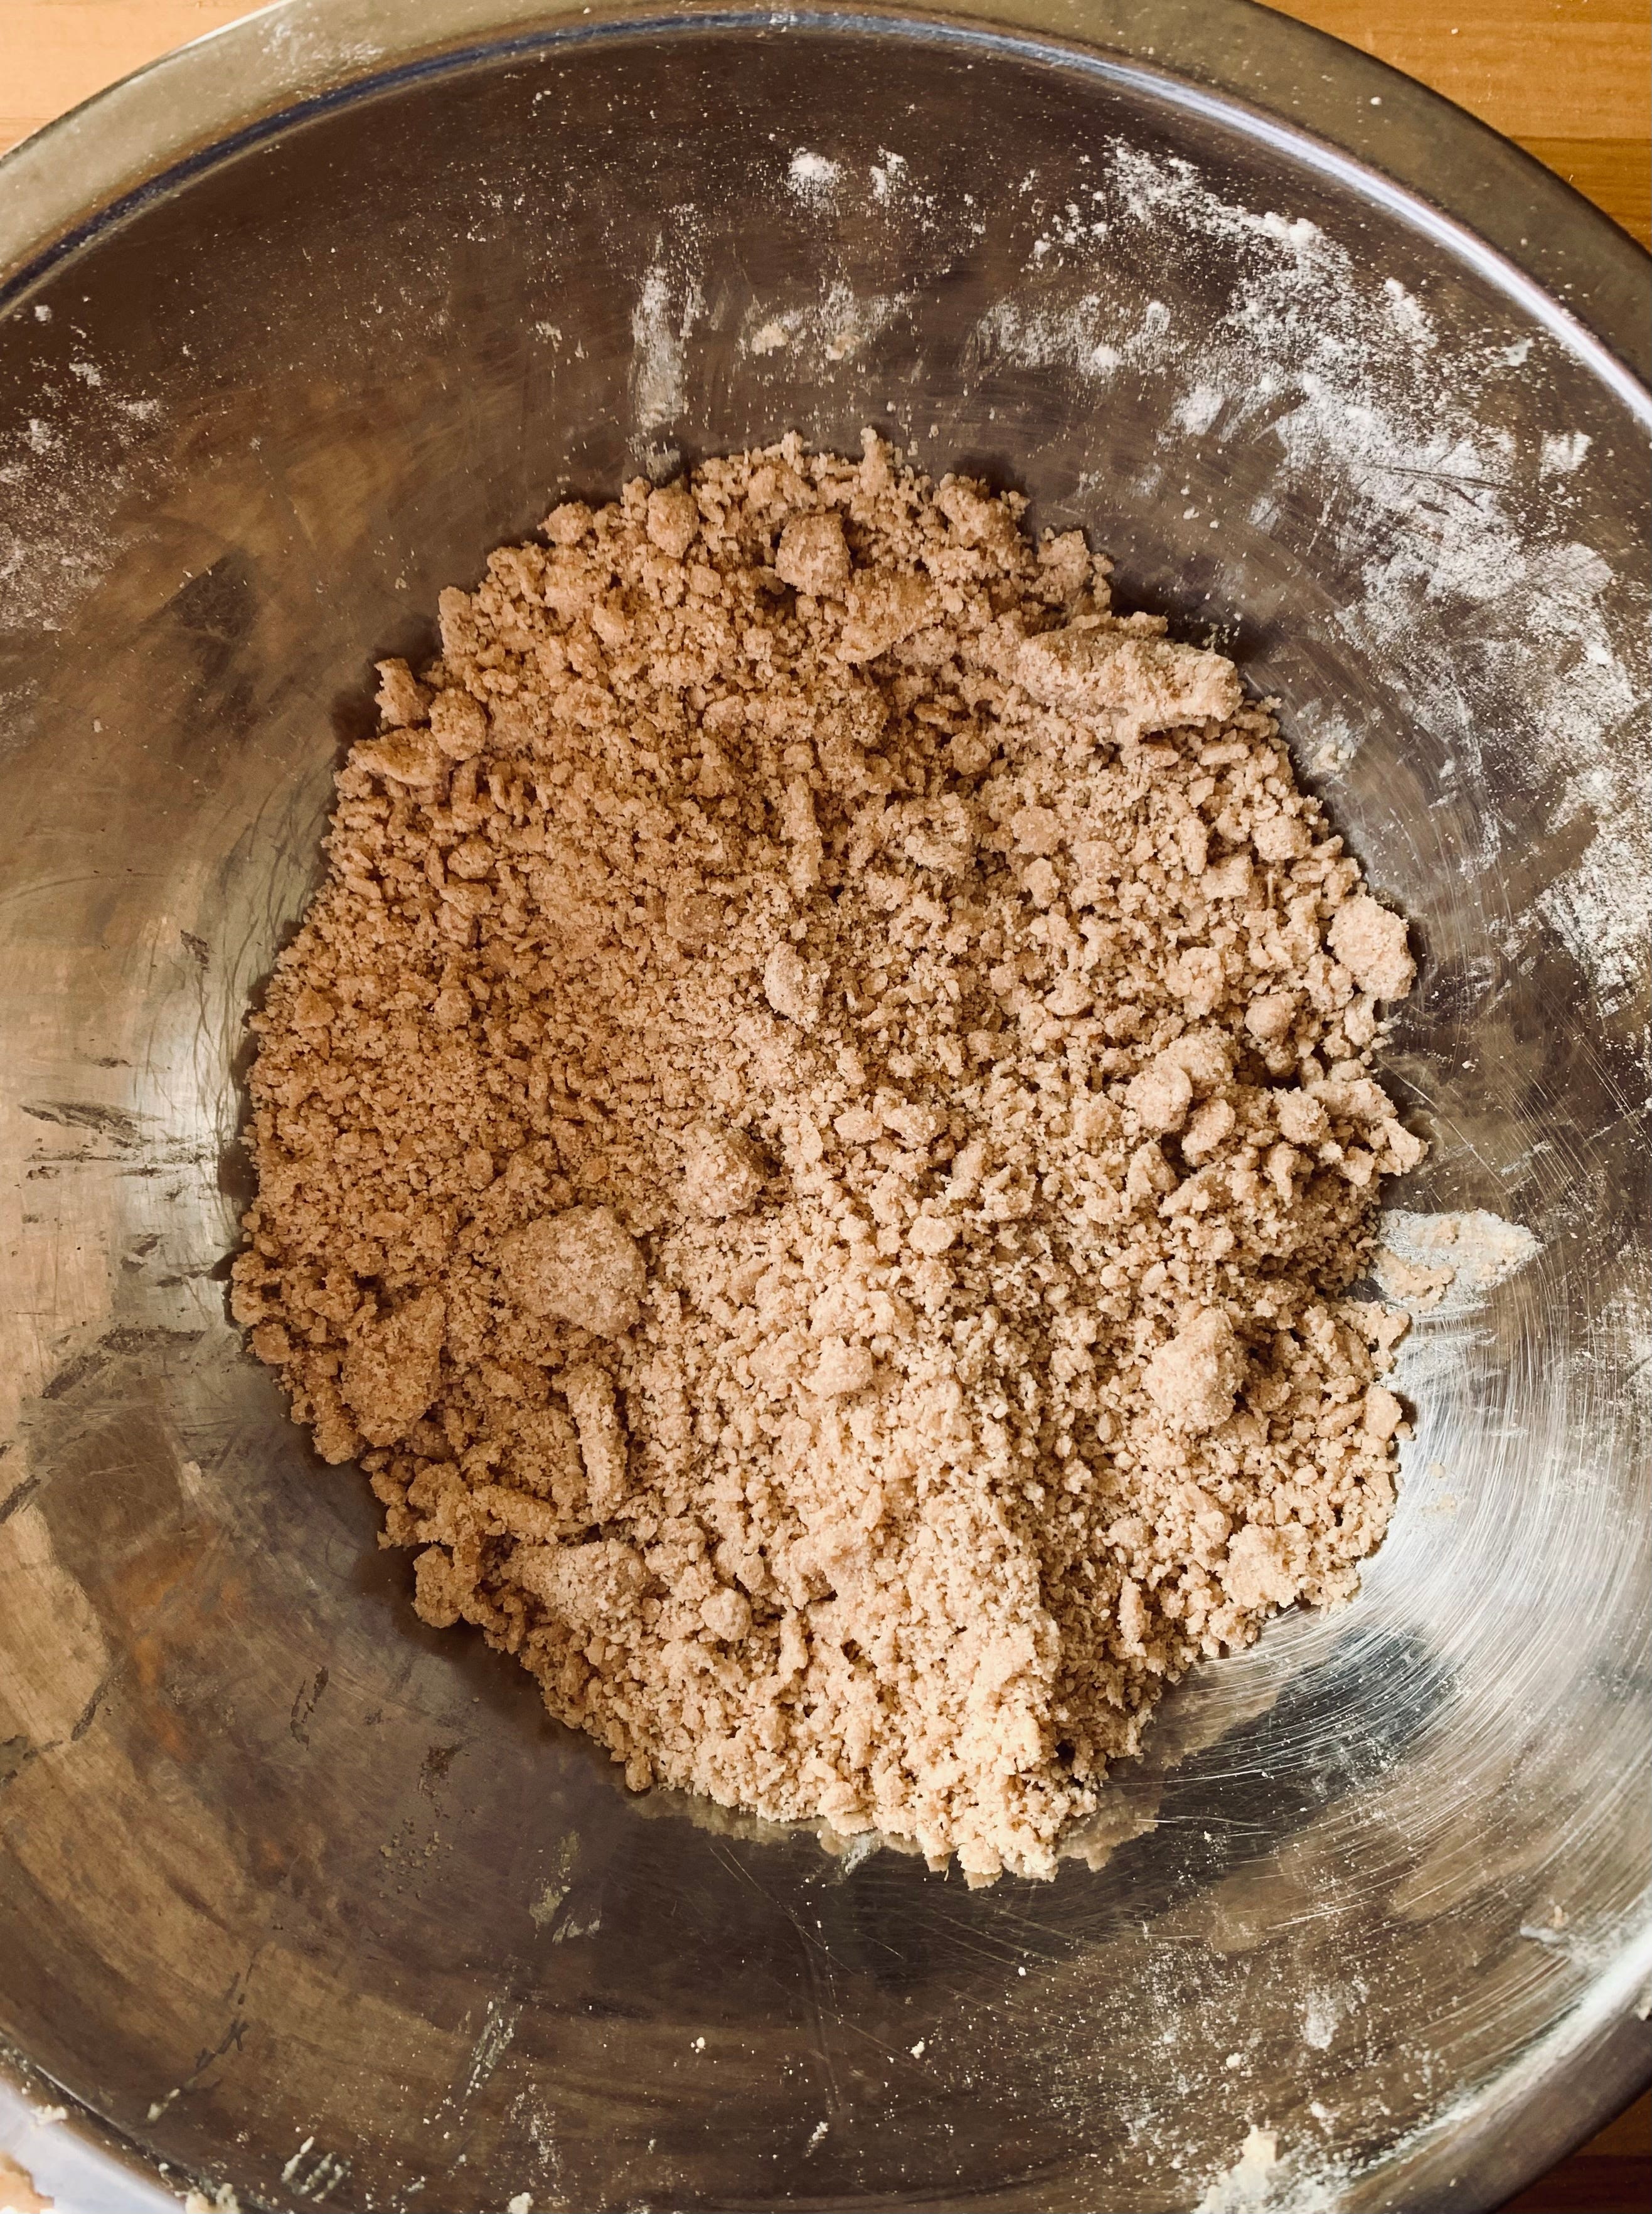
Whisk the flour and salt together in a medium bowl. Cut your stick of butter into chunks and add to the flour mixture (remember, butter should be cold, but not rock hard either). Pick up handfuls of the butter / flour in both hands, and in a squeezing motion, mush together and then work off your fingers back into the bowl. Repeat this motion over and over again until the dough makes little pea shaped balls and there are no “dusty” flour bits left. You don’t want to overwork this though.
Add ice cold water, sprinkling over dough mixture. Start with a little less than 1/3 cup, adding up to 1/3 cup if the dough feels too dry still. Feel it out. If you accidentally add to much water and it feels super wet, don’t worry! Just add some more flour to balance it out.
Lightly toss until it starts to come together. You do not want to work with the mixture much. Then form into a ball.
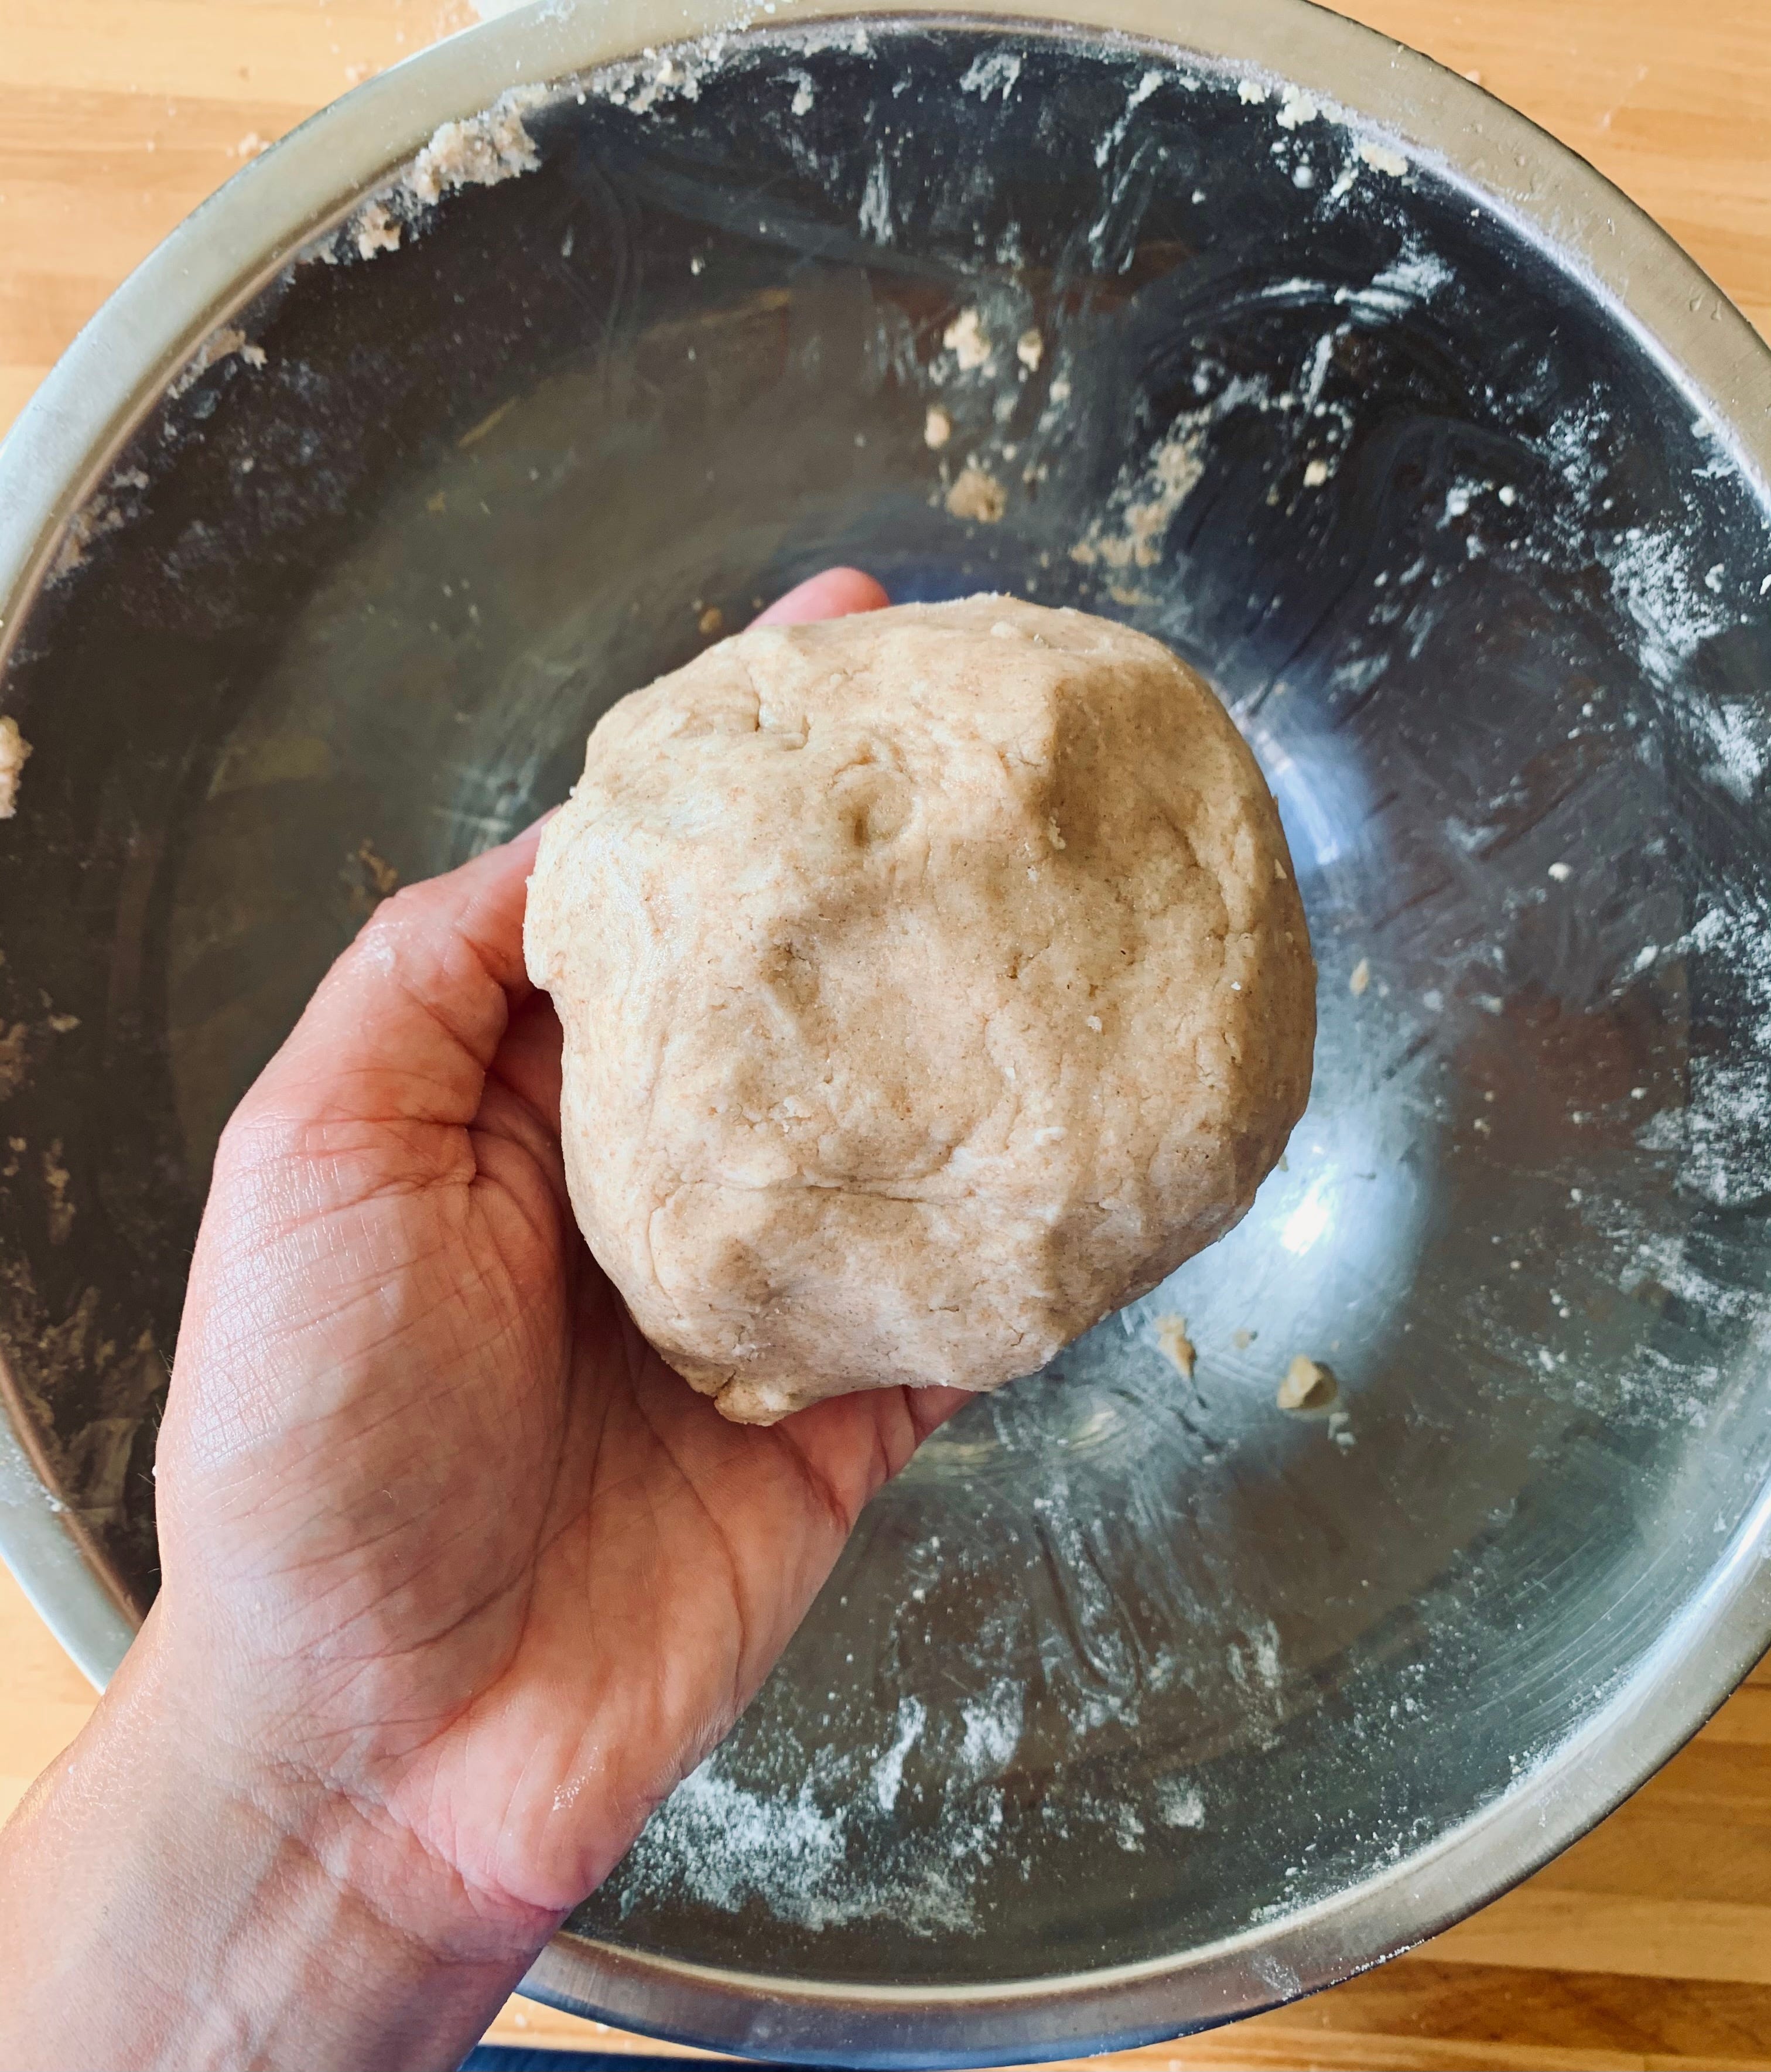
Rest a damp cold towel / paper towel over the dough ball in the bowl and put it in the fridge for 10 mins to rest.
Take a pie cloth or a piece of parchment paper lightly dusted in flour and put it on a flat surface.
Take your dough ball out of the fridge and separate into 2 dough balls. We’re going to make 2 galettes.
Start with 1 ball. Flatten it out with your hands as much as you can so it’s in a nice and even pancake. Place on the parchment paper and with a rolling pin (or a full wine bottle works too!) Roll out the dough until is is fairly thin. Remember, what’s cool about a galette is that it doesn’t have to be a perfect circle or have super smooth edges. It’s kinda meant to be ugly …or, sorry, as we say, “rustic.”
Place the dough on a parchment paper lined baking sheet.
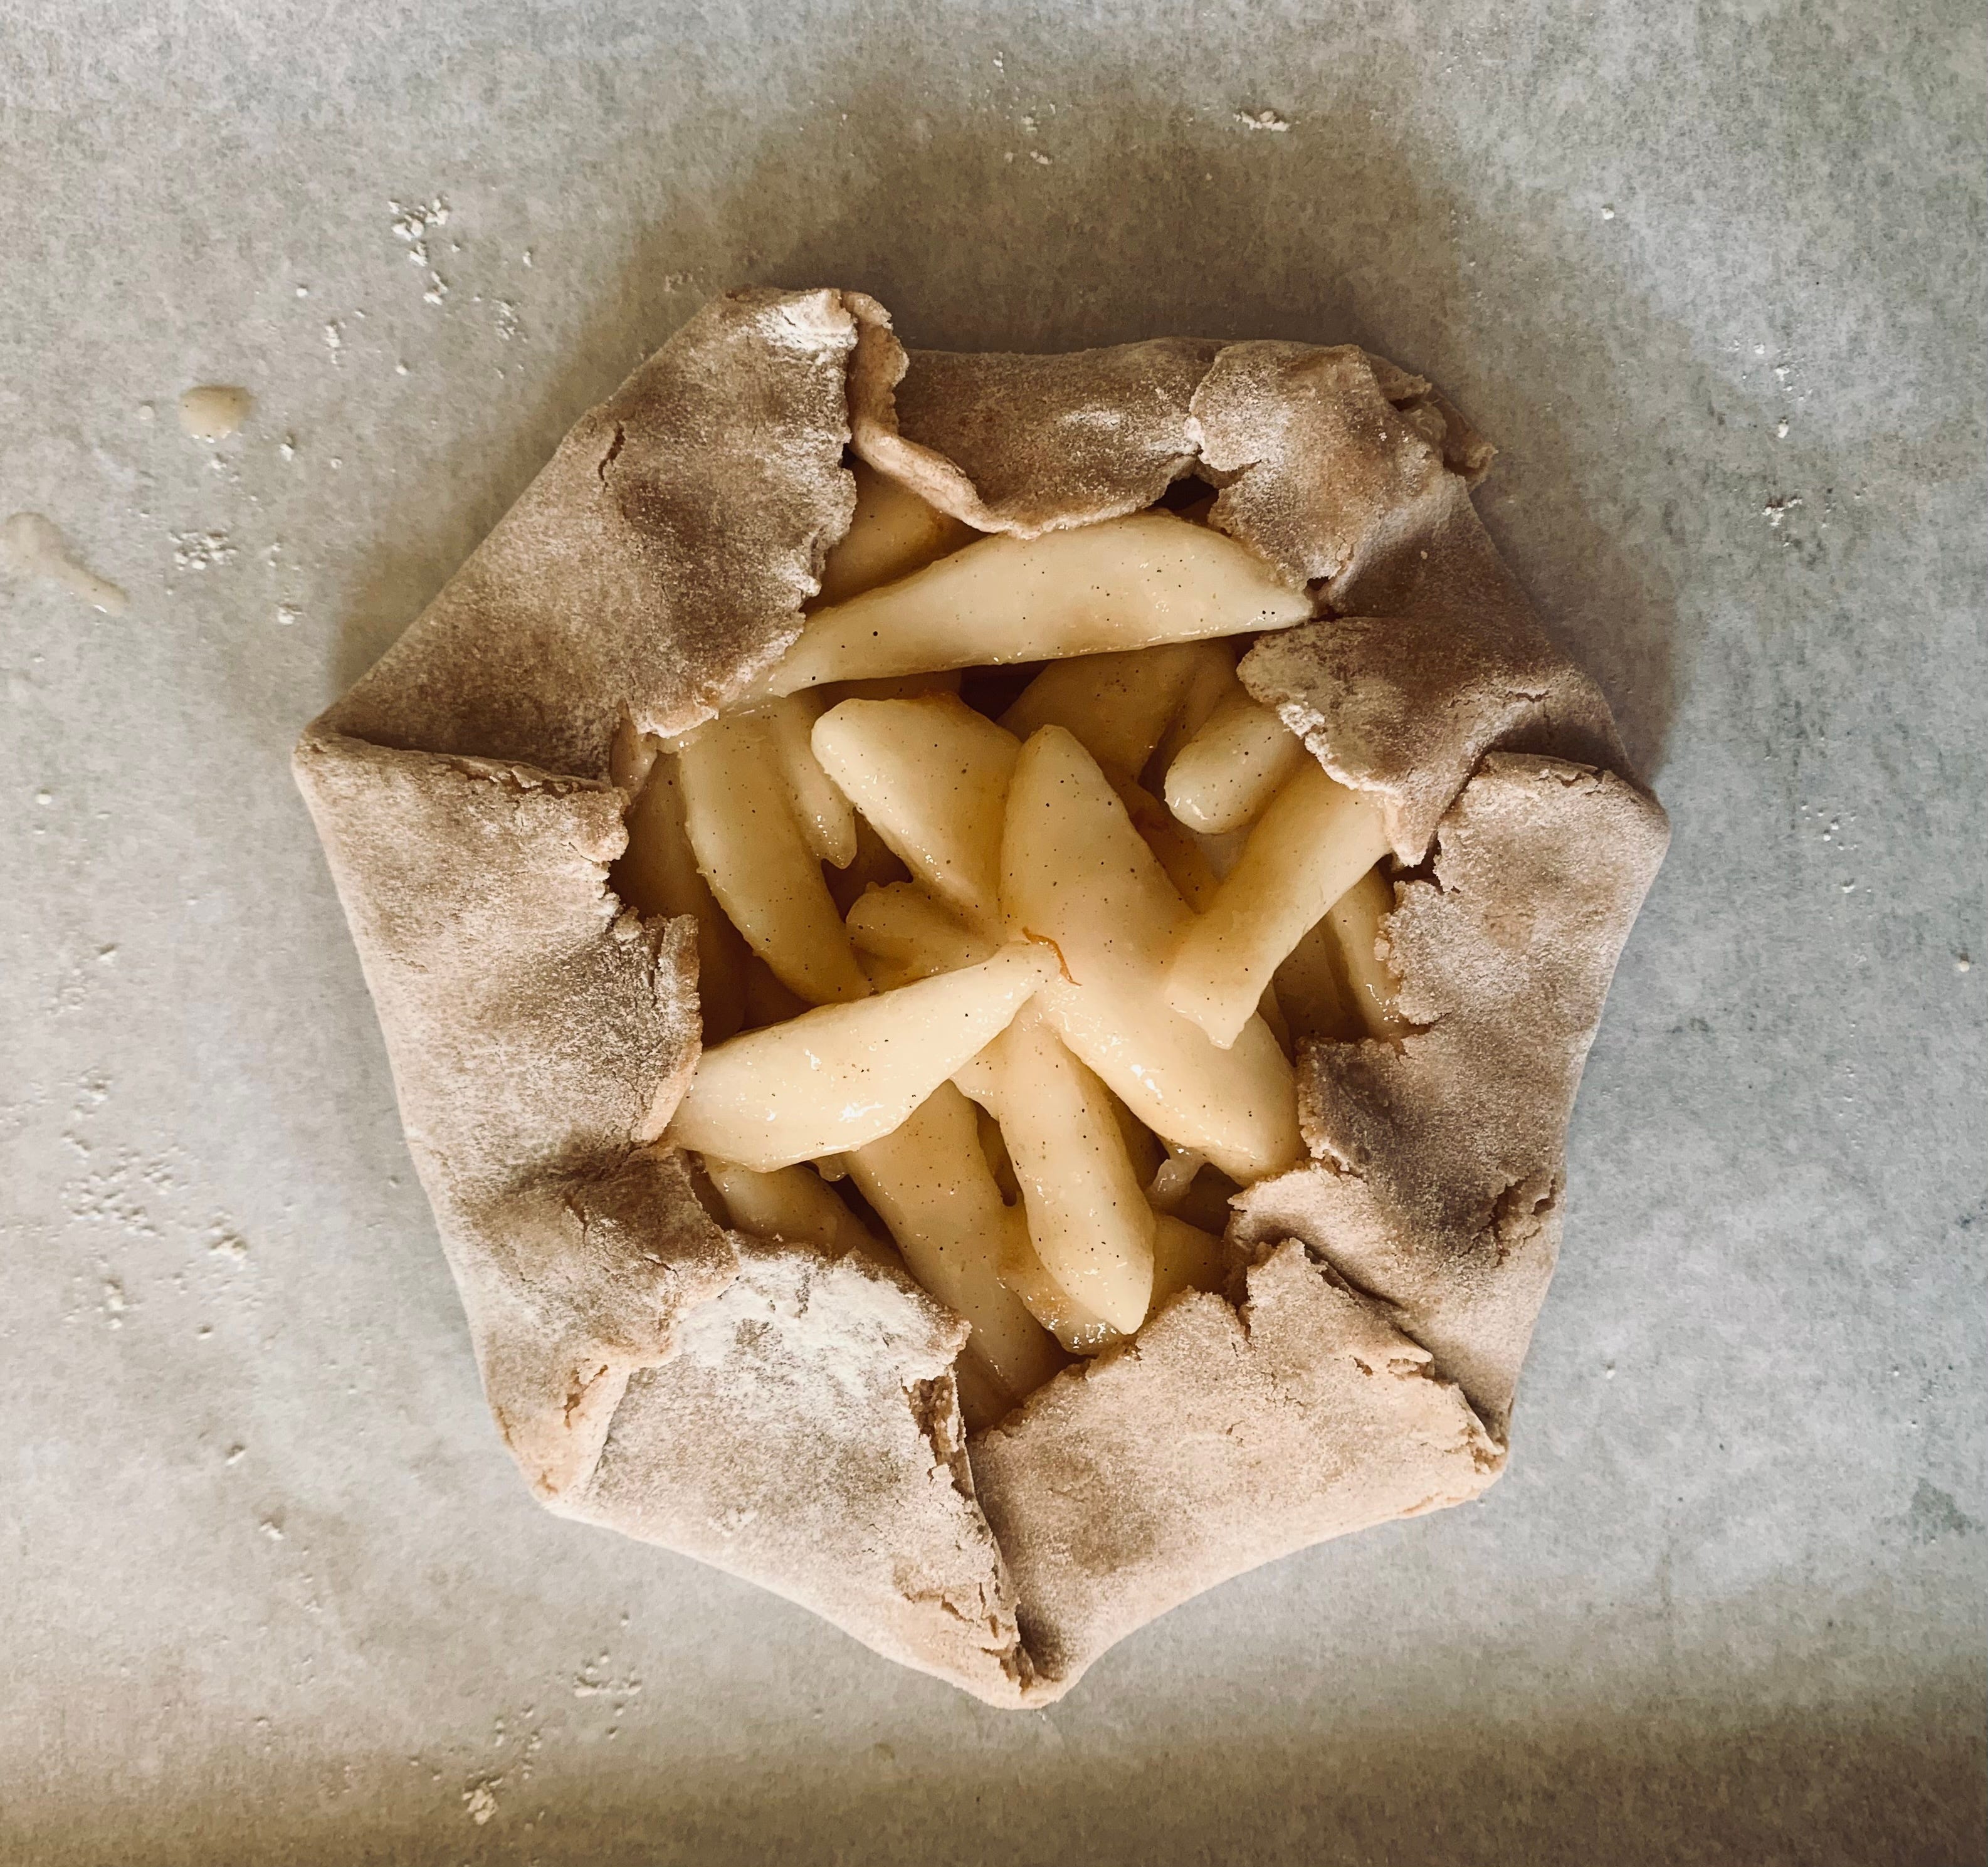
Take half of your fruit mixture and put it in the center (along with some of the juices at the bottom) fold over edges.
Brush the outside with egg whites and then sprinkle the dough with sugar and a little cinnamon.
Repeat again with your second dough.
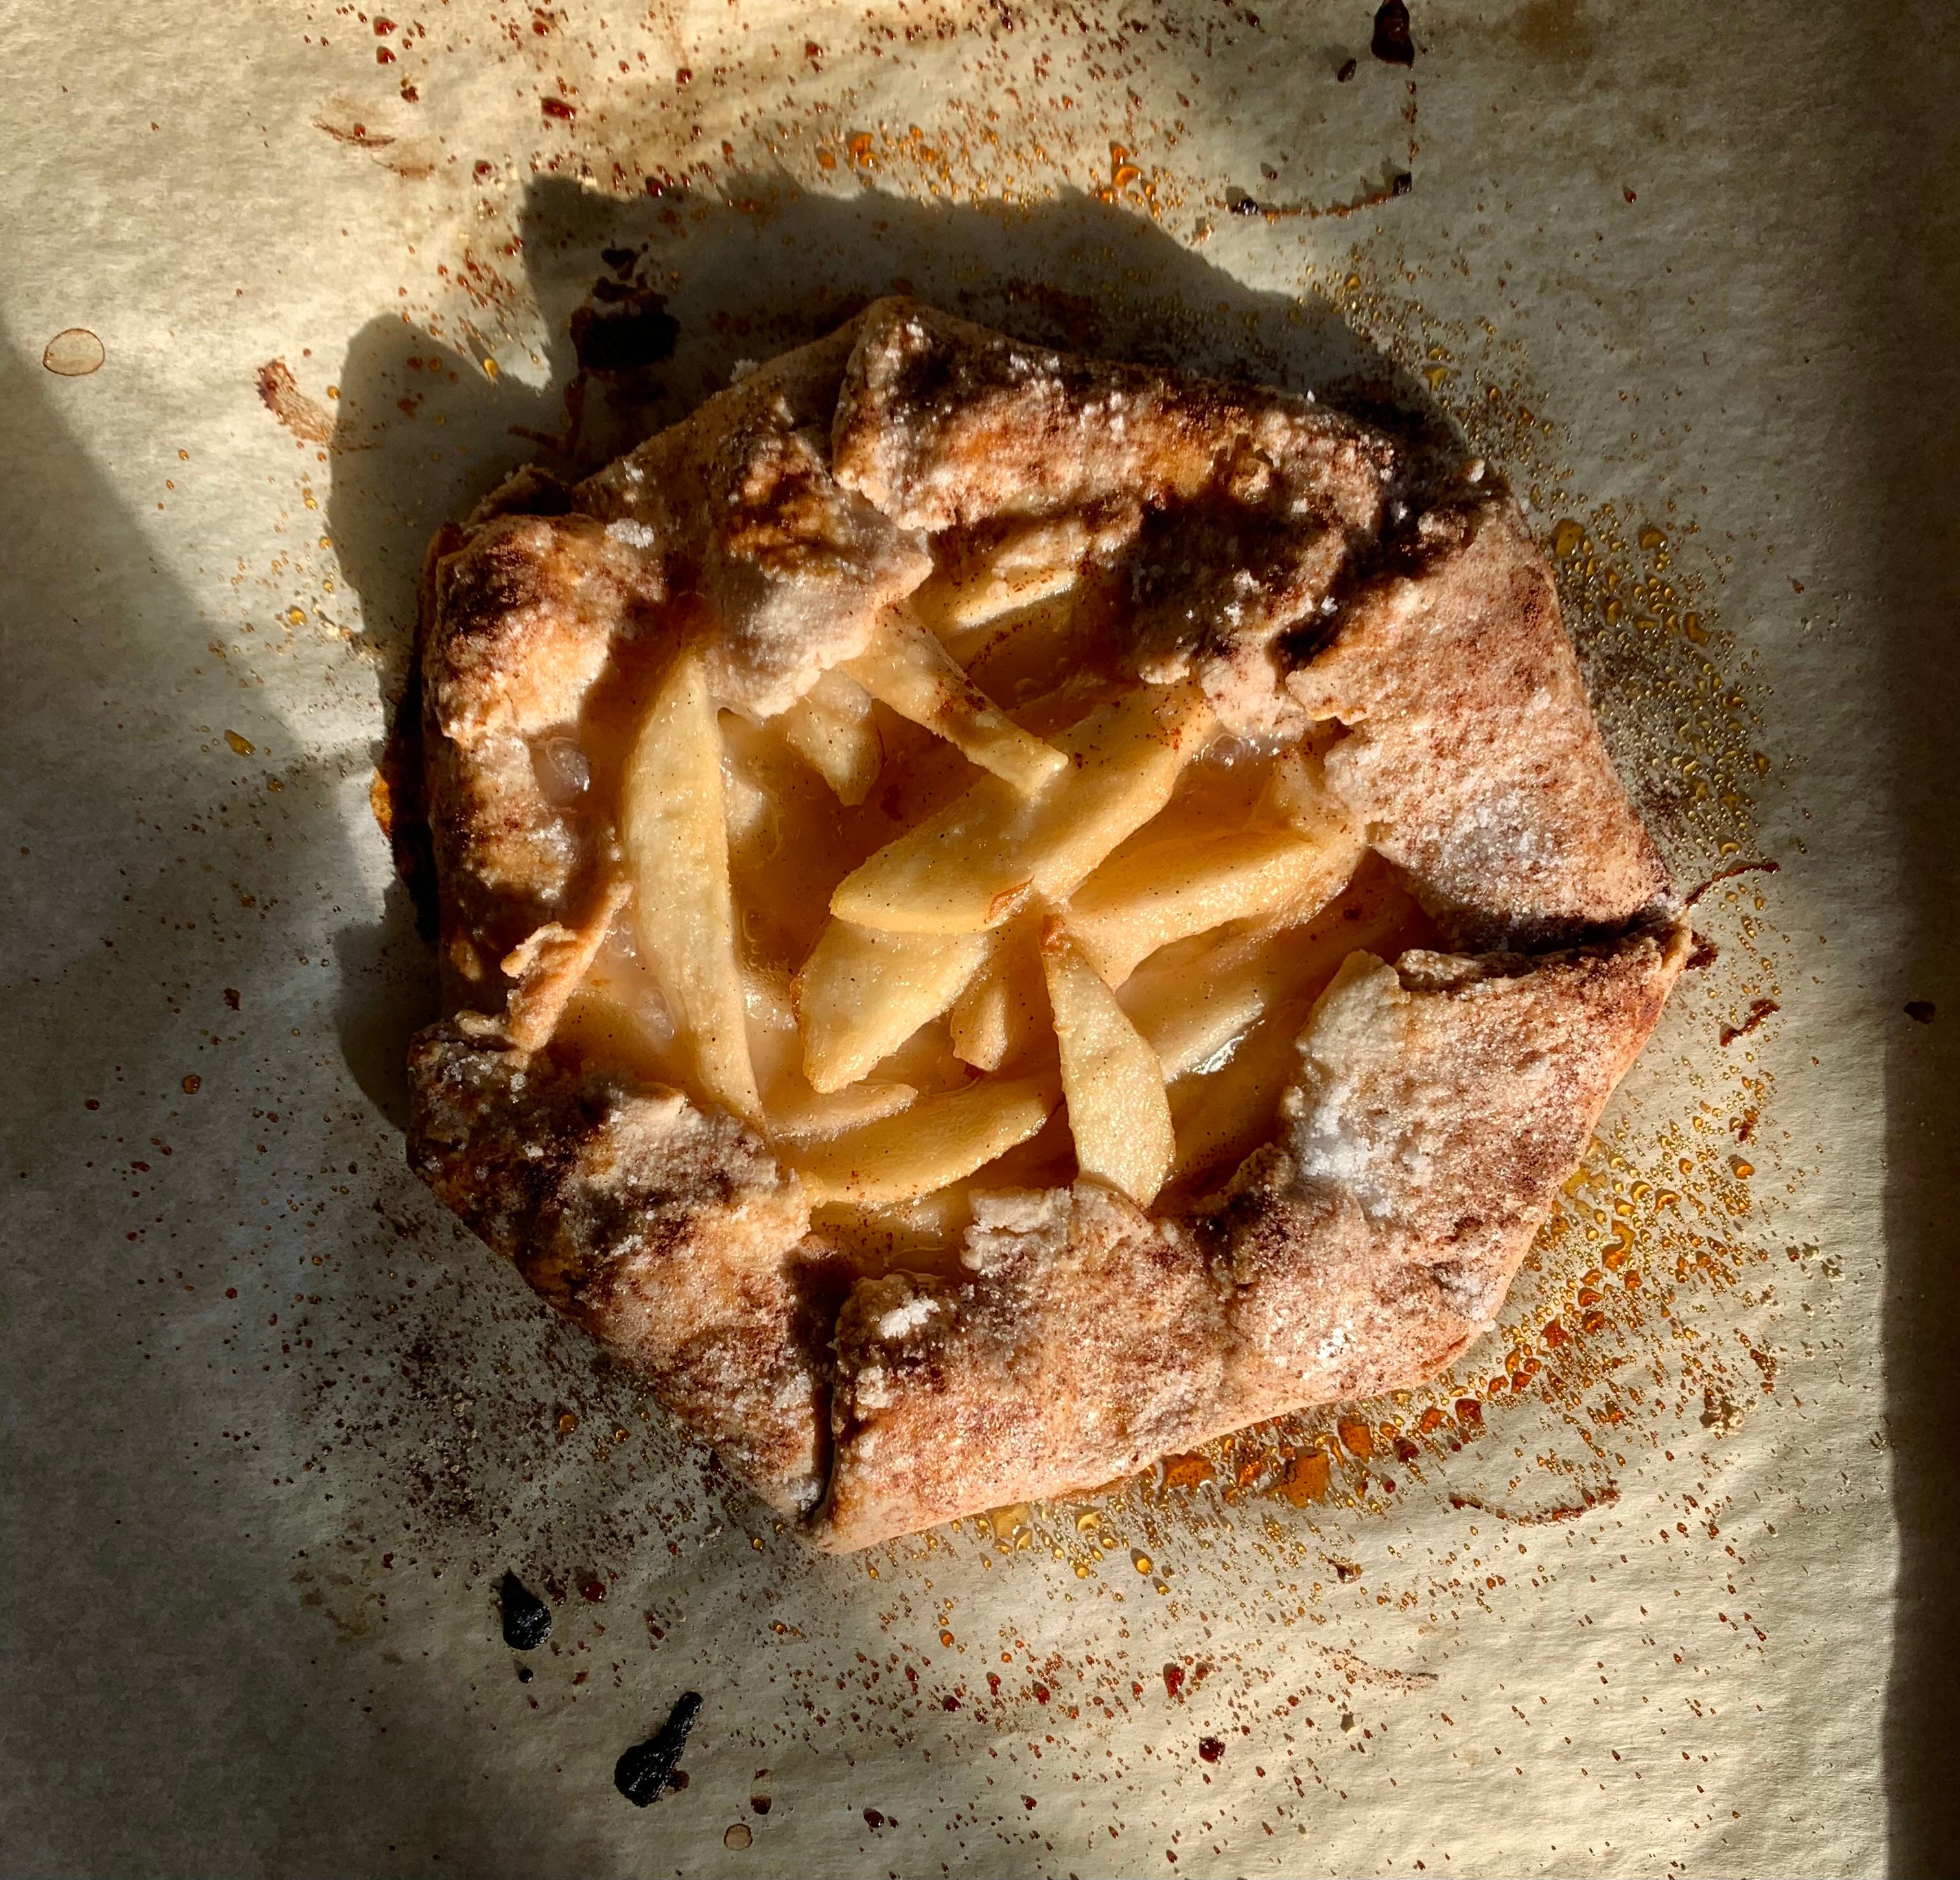
Bake for 40-45 minutes, turning the tray around halfway to get an even bake. You’ll know it’s finished when the crust is a nice golden brown and if you lift it up a bit, the bottom will be slightly brown as well.
And there you go!
Slice this up straight from the baking sheet and dig in. Share your second galette with a friend - they’ll love ya for it. Top it with ice cream if you’re feelin’ yourself (ice cream makes everything just a bit better, amirite?).
Surprise! This is the same recipe I use for pie dough. So the next stop on this pie choo-choo train will be an ACTUAL PIE! We’re going to get you ready for the big game day (Thanksgiving). Catch you next week, friends.
Happy baking, love ya mucho.
Tessa
Wow. This recipe was amazing. The half-whole-wheat flour really added something special to the flavor. Thank you for sharing!
Beautifully executed...